Build a Website for Your Local Small Business
If you have a local small business, you really need to have a website!
 In today's online world, it is critical that your business has a website. The day's of the Yellow Pages is done, the day of “Googling” is in. If folks can find information on your business when surfing the web, you are missing business!
The good news is, you don't have to have a high-tech cute website, a basic one will work just as well. It just needs to have the right information. Your website will provide critical information for your customers and clients. Hopefully, you have read the 10 Must Include Items in Your Website and have an idea of what you want to include. These 10 pieces of information will give folks the information they need to make an informed decision on your business.
Once you have the website done, you will be publishing it, in all the places that will allow you to you “claim” your business. For example, on Google, Bing, Yelp, Yahoo, local business websites, just to name a few. Remember, businesses with a picture and a website get way more traffic and more importantly phone calls and emails! So this website is an important piece of your marketing plan.
LET'S BUILD A WEBSITE!
Now that you know you need a website, I assume you are ready to get going on it, let’s walk through how you can get a website up and running. Below we will walk through the steps to build your website. Plus a video walkthrough. But first, let's discuss a few things you need to know.
As I have mentioned in the past, you can do a free version of a website over on WordPress.com. This isn’t the ideal way to do it, but if you have zero funds, it is a way to get a basic website up and running. The problem with this option is, your name will be YOURBUSINESS.WORDPRESS.COM. So, it is a little awkward to give the name out.
However, you could purchase a domain name at say GoDaddy.com and redirect it to this website as well. This would help you avoid that weird .wordpress.com addon to the back of the website address. It is a little more technical but doable.
But if you are going to go to this trouble, I’d rather see you spend less than $5 a month and do it the right way using a hosting plan.
HOSTING PLAN? HUH? WHATS THAT?
Don’t worry, hosting isn’t as complicated as it sounds. All it means is, you will build a website and another company will “host” it on their servers. Your customers and clients will not see anything that looks like a hosting company. All they will see and know is they are on your website looking at your website.

Servers will Host Your Website
Heck, once you set it up, you will rarely pay attention to your hosting site either. You will spend more time building and monitoring your website (more on that shortly) than you will be paying attention to the host.
For most of your businesses, you just need something basic and inexpensive to “house” the site. I have used both Bluehost and GoDaddy and for local small business owners. I recommend Bluehost as they have some of the most economical (cheapest) plans around. Great for folks like you. For our tutorial walkthru, we will use Bluehost.
PROGRAMS TO BUILD THE ACTUAL WEBSITE
Once you determine your “host” you will want to have a platform that you will build the actual website with. There are various different templates that you can build your website with. Each template out there uses certain tools within it to make it easy for you to do the basics. I personally love templates that are based on the WordPress platform. They are easy to learn and the preferred choice of many website builders.
Now, you probably recall, I mentioned the free websites at wordpress.com. They have some free templates that you can use. But the cool thing is, if you get a host, like Bluehost, you can either use these same free website templates or purchase one with a little more options available. Personally, I’d start with a free one, you can always upgrade later. This way you get familiar with how WordPress templates work.
For our tutorials, I’m going to just use a basic WordPress template. This way you can see how they function.
There will be two tutorials. The first will focus on purchasing and securing your new website and then in Part 2, we will walk through actually building the website. So more on WordPress templates in a bit.
With that, let’s start by setting up your hosting and domain name.
PICKING A DOMAIN NAME
A domain name is the name that people key in to get to your website. For example, you keyed in either localsmallbusinesscoach.com or startalocalsmallbusiness.com to get to this website. If you were Bob’s Plumbing you might want a domain name like bobsplumbing.com
If only it was that simple. As you can imagine, basic website names like this one, are more than likely gone. I’m pretty sure bobsplumbing.com is taken. However, at the time of this tutorial (I just looked), it isn’t. It can be yours for only $1000. Huh? Yea, some folks buy these up and try and resell for crazy numbers. This isn’t us. You should not have to pay more than $20. (Heck, you get a free one when you sign up with Bluehost… but more on that shortly)
So, Bob will either need to use a different ending other than the traditional .com (which by the way, I don’t recommend the other types of endings as most folks are more familiar with .com websites) or Bob will need to be more creative. Maybe Bob lives in Anytown. So, a great alternative might be bobsplumbinganytown.com. What is nice about this is, it really shouts the town Bob works in. So your town is a great add-on if your original name is taken.
HERE ARE A FEW TIPS ON CHOOSING A DOMAIN NAME:
- Keep it memorable and not too cute and clever. You want folks to be able to remember it. Pick memorable over clever.
- Don’t use any dashes or weird symbols that are difficult to type as people will forget them. People will skip them anyways and go to other people’s websites. Most folks just remember names, so other items get forgotten.
- Avoid difficult to spell words. This also ties to those cute play on words like Cool vs Kool. I'm not saying don’t do it, but make sure your branding is clear if you do.
- Use an appropriate name extension (.com is still by far the most popular, but you can also use a .biz if you really are set on a name that no longer has the .com. Just be prepared to emphasize this or people will type in .com and go to their website)
While it’s important to pick a name that’s memorable, I wouldn’t overthink this step. It’s easy to sit around and procrastinate picking the name for your website. It’s best to simply start and get things moving. I’ve watched people spend weeks thinking of a name vs just picking it and doing it. You can always change later if needed but odds are you have already built a brand you can use. If you are just starting out, don't let this phase become bigger than it needs to be.
Here is a Search Tool if You Want to Check Now
WHERE TO BUY DOMAINS:
- BLUEHOST – You get a free domain when you purchase their hosting packages. We will dive into hosting next. But this is a great way to save $10 – $20 the first year.
- GODADDY – When I’m just looking for domains, I tend to use GoDaddy as they have a great search tool. The hosting is a little more with them, however. So, if you are looking for a more economical option, g with Bluehost as it will be much cheaper
WHERE TO HOST YOUR BLOG
I’m going to use Bluehost in our example below and in the video, as they are a great option for folks looking to house a basic website like you will be setting up. You can always change in the future, but for now, our goal is the basics.
The reason I recommend Bluehost is, I’ve used them on earlier basic websites I did and found them really easy for first timers and you can’t beat the price compared to other options.
Now, I will say that the Bluehost links you see on here, are affiliate links (meaning I earn a small commission) but please know, that I only recommend products that I feel are the best options for my local small business owner peeps. This isn’t about me, it is about you and your business.
READY TO START YOUR WEBSITE?
From here on out, we will walk through how to set up your new website. To help you get up and running, I have done two types of tutorials since we all learn differently. Below is a step by step walkthrough using snapshots from the website. However, if you are more of a visual learner, then check out the video walkthrough below. But I’d still scroll through the pictures below to get an idea of what to expect.
PART 1: SET UP YOUR DOMAIN AND HOSTING SERVICE WITH BLUEHOST*
Ok, so let's get this website up and running. As I mentioned, we will be using Bluehost for our hosting company and example.
First – Head on Over to Bluehost
[bha size='488×160′ variation='01' align='aligncenter']
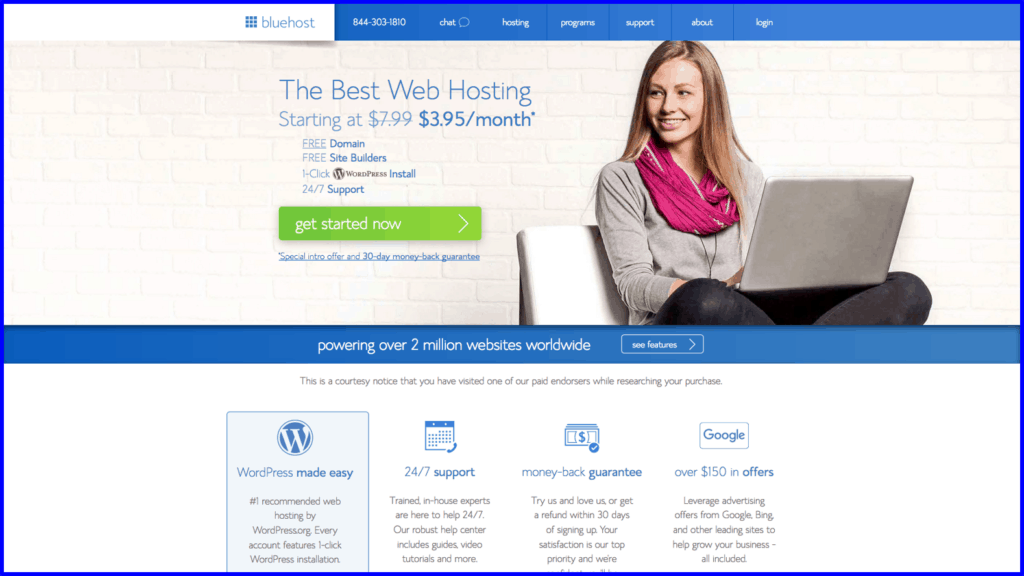
You Should Land on the Main Page:
You will notice from below, that you will be saving off the normal monthly price. Plus, you will get your domain name for free!
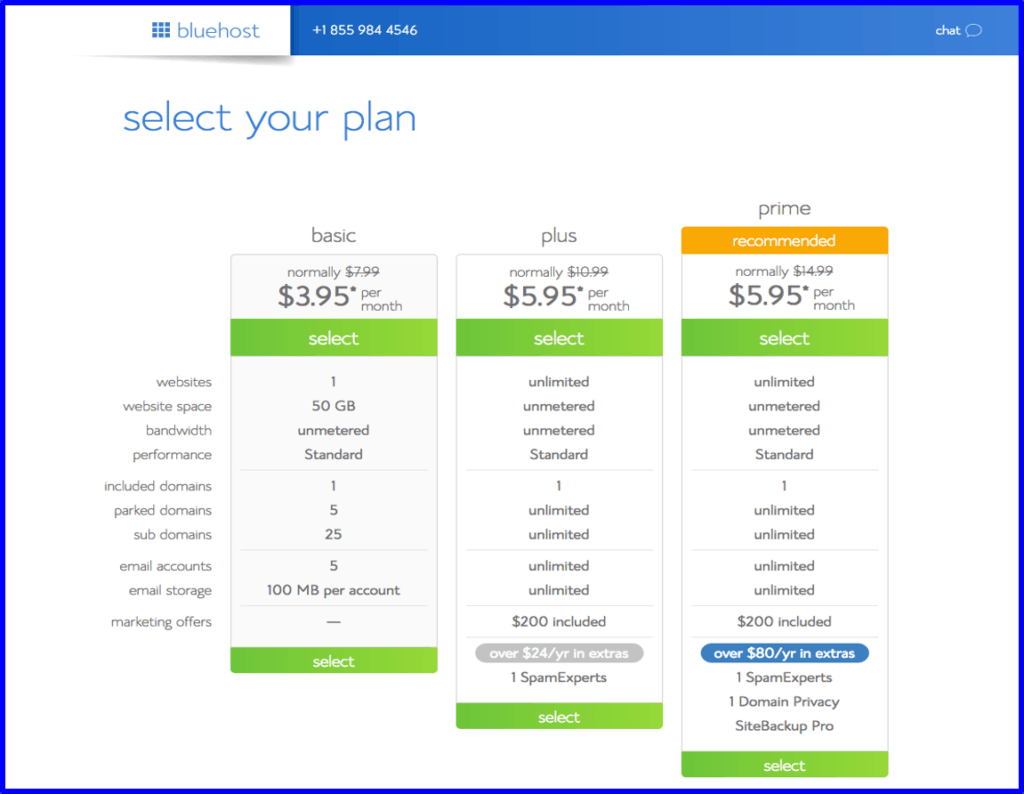
NEXT, YOU WILL SELECT YOUR PLAN.
Basic should be good enough to get you started. You can always upgrade later if you need to! Your price will also be determined by how long you commit. The longer you commit, you get the best price. If funds are tight, pay the extra $2 month and do a year at the time if you want. (Plus you are still saving off the normal pricing) You’ll understand when you log in or watch the video as I show this in more detail in the below video.
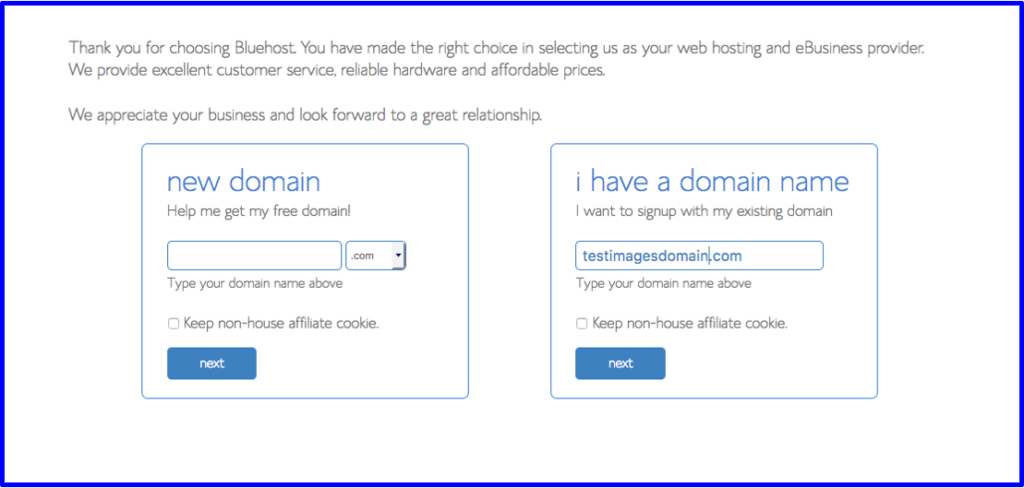
TIME TO PICK YOUR NEW DOMAIN NAME! (Note: When you sign up for Bluehost hosting you’ll receive a free domain with your hosting plan! Awesome). Here is where I recommend you try your business name first and if taken, then try your business name plus your town for example. Also, try and stick to a .com as that is most common for people to try. Here is a snapshot of where you will key it in. SIDE NOTE: Please double check your spelling! I even made a mistake in my video on my spelling due to not proofing before hitting submit.
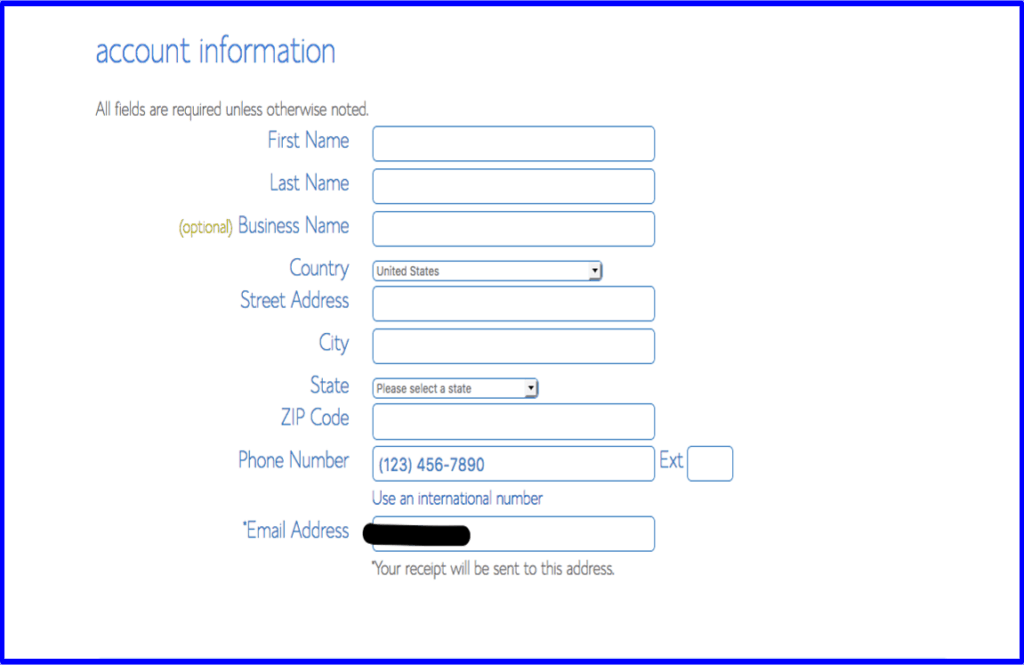
ENTER YOUR ACCOUNT INFORMATION: Here is where you will key in your personal information. Make sure you write down your username and password. You will need them later.
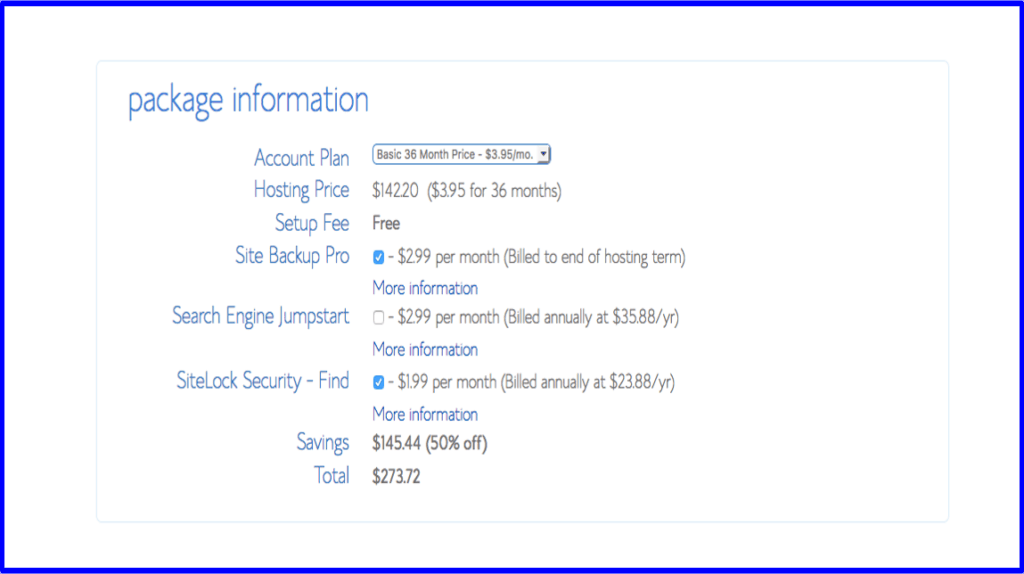
SELECT YOUR PLAN AND EXTRAS: After you do your account information, you will also select your plan, plus you can select any extras you’d like to include with your hosting. For example, you can include the domain privacy protection so as to keep your information private, which is only $.99/month.
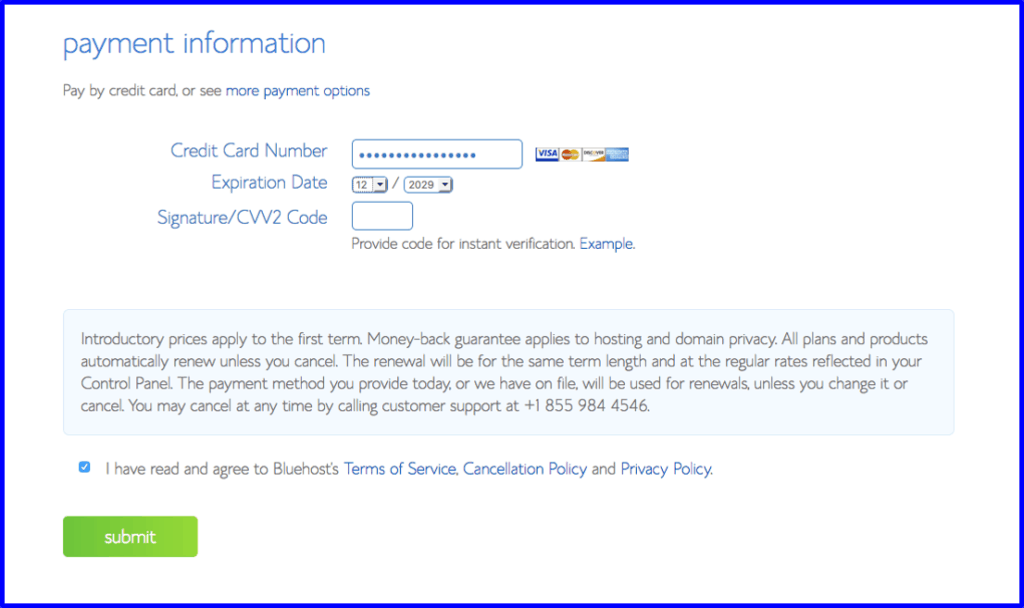
PAY & SET UP ACCOUNT: Next up, you will pay for your selections.
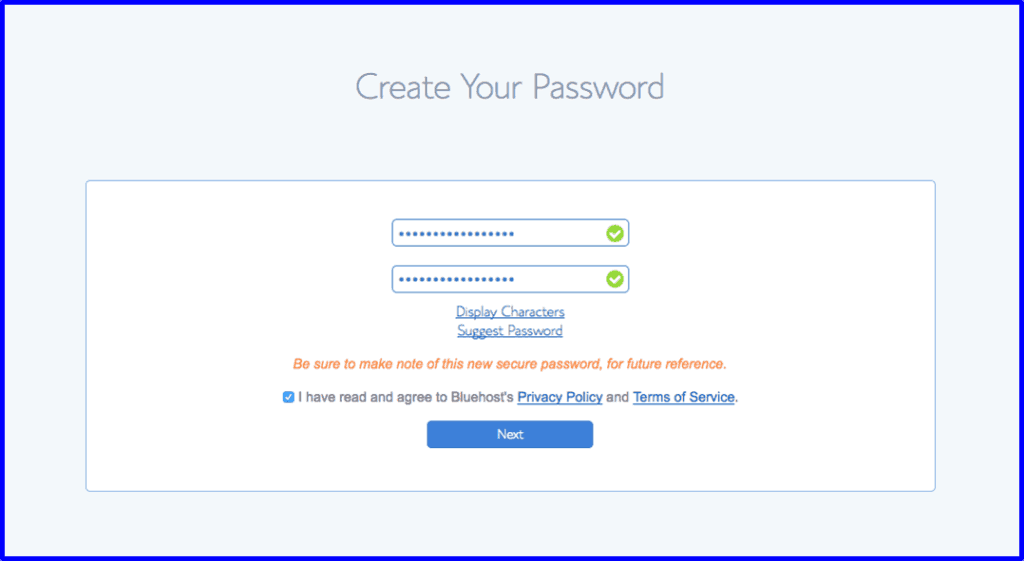
PICK YOUR PASSWORD: Don’t forget to write it down! You will have a few criteria like caps, numbers and special characters. Plus, it will need to be unique. (just warning you) 
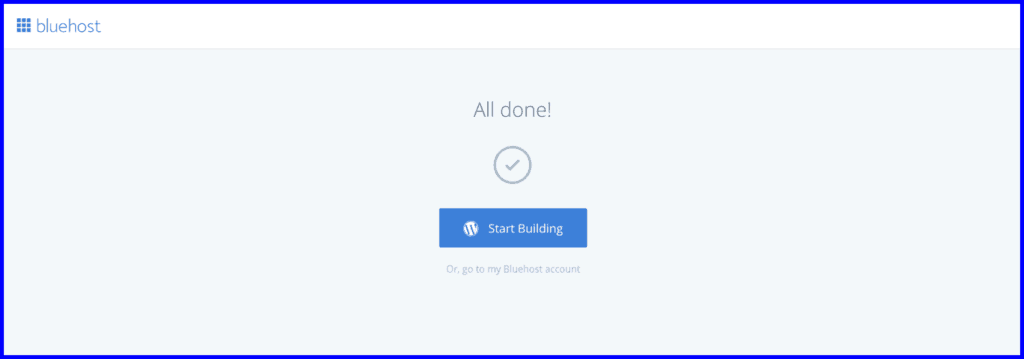
CONGRATULATIONS! You now officially have a website in the works!
Next Up: Step 2 where we will walk through how to create something for people to view and visit for information on your company. But first, the below video will show the above steps in real time for those wanting to see a little more.
Here is a Video Walk Through if you Prefer to Watch the Above Steps:
Part 1 – Setting Up the Domain & Hosting
~~~~~~~~~~~
Coming Soon…. Part 2 of How to Build Your Local Small Business Website
Get Weekly Business Tips

Each Week I'll Share One Quick Business Tip to Help You Start Increasing Your Profits! Start Earning $3,000, $5,000, $10,000 a Month.
Stop working those crazy hours and start working smarter, not harder.
Time to Increase Your Profits, Boost Your Sales, Improve Your Processes and Develop Stronger Teams!
TIME TO START EARNING $100,000 a Year in TAKE HOME PAY!!

1 Comment
[…] Learn More About How to Build a Website for Your Local Small Business, here is a video walkthrough on getting up and running in […]